How to Build Ramp for Shed?
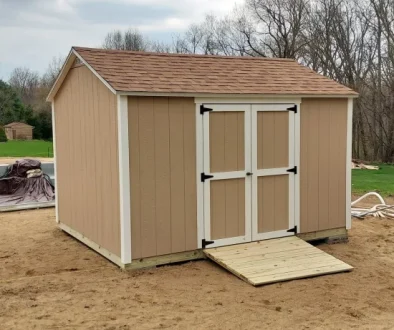
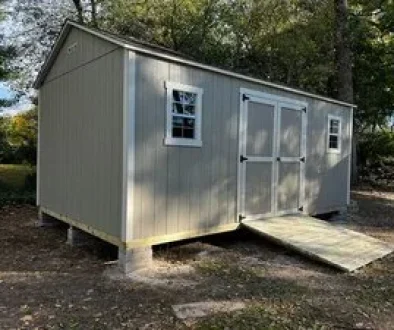
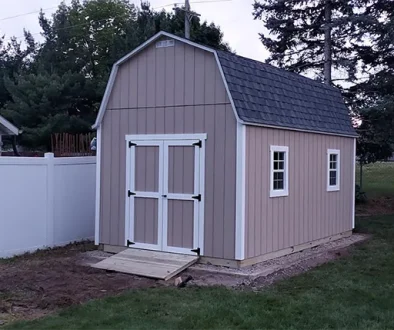
I still remember the first time I tried to roll my lawnmower into my shed. I had to lift it halfway, and my back didn’t forgive me for days. That’s when I realized how much a shed ramp changes things. A shed ramp makes life easier by letting you roll in heavy tools, mowers, or wheelbarrows instead of lifting them.
It also helps anyone using a wheelchair, scooter, or stroller move in smoothly. A ramp also protects your shed floor from cracks and damage caused by dragging equipment. Many people make mistakes by guessing the slope or skipping a solid base, which weakens the ramp. Let our expert shed builders show you how to plan, build, and maintain a strong, long-lasting ramp. Most ramps take a few hours to build and cost around $100 to $250, depending on materials.
Check If You Need a Permit First – Building Codes & Regulations
Before cutting a single board, I always check the local building codes. Some areas ask for a permit when you attach a ramp to a permanent structure or build one above a certain height. A quick call to your local office can save you headaches later. The slope of the ramp matters a lot. A gentle slope makes it safer and easier to use:
| Use | Recommended Ratio | Example for 14” Height | Notes |
|---|---|---|---|
| Light equipment | 1:4 | 56” length | Suitable for small garden tools or light-duty carts |
| Lawn mowers | 1:5–1:6 | 70–84” | Provides a moderate incline for wheeled yard equipment |
| Wheelchair accessible | 1:12 (ADA compliant) | 168” | Meets ADA slope guidelines for accessibility |
ADA rules apply when the ramp is meant for accessibility, such as for a wheelchair or mobility scooter. In that case, you’ll need a longer ramp with handrails on both sides and a stable landing area at the top and bottom.
Even for regular shed ramps, side rails help keep wheels on track and prevent slips. I always add a non-slip surface like rough decking strips, rubber mats, or textured paint. These small steps keep the ramp safe to walk or drive on, even in rain or snow.
Steps to Plan the Ramp for Shed
Good planning saves a lot of time later. Before you buy any lumber, grab a tape measure and start with the basics.
- Step 1: Measure the shed floor height. Measure from the ground to the top of the shed floor where the ramp will meet. This number decides how long your ramp needs to be.
- Step 2: Find the right slope. Use the slope ratios from the earlier table. A gentler slope is easier to use, especially if you roll heavy tools or use a wheelchair.
- Step 3: Pick the right width. Think about what you will drive or roll up the ramp. A 3-foot width is fine for walking or a push mower. Go wider if you use an ATV or large mower.
- Step 4: Check the ground. Look at the soil, slope, and drainage. Soft or uneven ground might need gravel or concrete blocks for support.
- Step 5: Decide the access direction. Choose where you want the ramp; it could be at the front, on the side, or even two ramps for different entrances.
- Step 6: Plan smooth transitions. Make sure the ramp connects perfectly with the shed floor. You can add a small metal strip or trim the edge of the ramp boards for a clean fit.
Shed Ramp Materials Compared — Choose What Works Best for You
Selecting the right material makes a significant difference in the lifespan of your ramp and its ease of maintenance. I have built a few different types over the years, and each has its pros and cons depending on the budget and how you plan to use the ramp.
| Material | Pros | Cons |
|---|---|---|
| Pressure-treated wood | Affordable and easy to cut or screw | Can warp or rot over time |
| Composite decking | Resists weather | More expensive |
| Concrete | Very strong | Permanent and labor-intensive |
| Metal (aluminum or steel) | Lightweight & tough | Can be expensive |
| Recycled plastic lumber | Eco-friendly and rot-proof | Harder to find in some areas |
Pick the Right Wood and Fasteners
If you are going with wood, always use pressure-treated boards. They hold up better against rain and insects. Look for grades marked for outdoor or ground contact. For screws and nails, I stick with galvanized or stainless steel. They don’t rust or stain the wood like regular steel fasteners can.
Add Grip and Protection
Ramps can get slick when wet, so I always add anti-slip coatings or treads. You can use textured paint, rubber strips, or adhesive treads for better traction. Finally, seal your ramp with stain, paint, or clear sealant to protect it from water and sun damage. A quick coat every year or two keeps the wood looking good and helps it last much longer.
What are the Essential Tools Required to Build the Ramp?
Here’s a simple list of tools I keep ready before starting the build:
Site Preparation Before Building a Shed Ramp
Getting the site ready is the first real step in building a strong shed ramp. Start by clearing the area of grass, rocks, and roots, then mark the outline with stakes or spray paint. Use a shovel to level the ground and set a gentle grade. If the area is uneven, fill low spots with compacted gravel or use concrete blocks for support. Avoid piling loose soil under one side since it can shift or sink over time.
Next, focus on drainage and stability. Spread a few inches of gravel beneath the ramp so rainwater can flow through instead of pooling. In damp spots, add geotextile fabric under the gravel to keep the base firm and weed-free. In cold regions, dig below the frost line for posts or supports to prevent lifting during freezes. On sloped ground, use edging boards or landscaping fabric to stop soil erosion and keep the ramp base steady.
Whether you are drawn to the modern simplicity of a Lean-To, the classic versatility of a Gable, or the spacious elegance of a Barn shed, we’ll help you design the perfect structure for your space, your needs, and your lifestyle.
Step-by-Step Easy Construction Process of Shed Ramp
Now I am listing the step-by-step method to build your shed ramp easily. Follow these clear steps, and you will have a strong, safe, and ready-to-use ramp in no time.
Step 1: Build the Foundation
Start by laying a solid base for your ramp. You can use concrete blocks, pavers, or pressure-treated 6×6 beams to form the foundation. Make sure the surface is firm and level before you move ahead. I like to spread a few inches of gravel underneath to help with drainage and prevent the wood from getting too moist. Take your time adjusting the blocks until the base sits flat. A well-level foundation is crucial to keep the entire ramp steady and prevent it from shifting over time.
Step 2: Attach the Ledger Board
Next, mark where the ledger board will attach to the shed. It should line up perfectly with the shed floor. Use lag screws or structural screws to fasten it into the frame, not just the siding. Leave a small gap between the ledger and the shed wall so rainwater and debris can drain out. Double-check that it’s level and secure before adding any joists. The ledger is the backbone of your ramp’s connection, so make sure it’s strong and straight.
Step 3: Install Joists and Supports
Cut the joists to match the ramp’s planned length and angle. Attach each one to the ledger board using joist hangers or a notched connection. I prefer joist hangers for an easier, cleaner fit. Add posts or beams under the outer edge of the ramp for extra strength, especially if the ramp is long. Check the slope after installing the first joist to confirm it matches your plan. Once the joists are in place, the basic frame will start taking shape.
Step 4: Frame Bracing and Level Check
Now that the frame is built, add diagonal braces to stop the ramp from shifting side to side. Secure the braces between joists or from the base to the outer beam. These extra supports keep the ramp solid even under heavy loads. After installing them, recheck the level and slope using a long straightedge or level tool. Small adjustments here make a big difference later. A balanced frame means the decking will fit better and last longer.
Step 5: Frame Bracing and Level Check
Lay your decking boards over the joists in your chosen direction. You can run them parallel or perpendicular to the ramp’s length, depending on your look and strength preference. Keep a small gap of about 1/8 to 1/4 inch between boards for water drainage. Trim the edges flush for a clean finish. Once done, add anti-slip strips or a textured coating so the surface stays safe when wet. This step gives your ramp its final shape and appearance.
Step 6: Finishing Touches
Finish by sanding rough edges and sealing the wood with paint or a clear outdoor sealant. This protects against moisture and sunlight. You can also add side edging or wheel guides for extra safety if you use heavy equipment. Walk up the ramp or roll your mower on it to test for movement or noise. If everything feels sturdy and smooth, you’ve built a ramp that will last for years.
Design Variations and Customization Options
You can adjust your ramp design to match your shed or yard setup. A double or multi-sided ramp works great for sheds with more than one entrance. If space is tight, build a fold-up or removable ramp that you can lift when not in use.
Modular aluminum or steel ramps are lightweight and easy to move around, perfect for portable sheds. For a permanent option, a concrete ramp offers the most strength with minimal upkeep. A hybrid design that uses a wood frame on top of a concrete base gives you both durability and a classic look. For short-term setups, portable ramps made of metal or plastic provide quick access without major construction.
Wrapping Up
Building a shed ramp is not as hard as it looks. With the right plan, solid materials, and a little patience, you can create a ramp that’s safe and long-lasting. It makes moving equipment easier, keeps your shed floor protected, and improves access for everyone. Once you have built it, simple maintenance will keep it in great shape for years. A good ramp truly completes any well-planned shed setup.


